Sunday 30 November 2014

Chicken curry with mango

Just recently I have been very enthused with typically British food, but today I am going to write about something very different - a curry.


Not that curry is necessarily un-British. We eat lots of it. British-style curries are normally one of two types: either so hot with chilli that they burn your mouth (much favoured by the younger, male element of our population) or so mild that they barely merit the name "curry" (one teaspoon of Madras curry-powder in a meal for four). My dish is mid-way between these two extremes, and uses a home-made curry powder which Jane makes in large batches from time to time. It is made from whole spices which are roasted and then ground. Very fragrant!
Before I go any further, let me just say that this is a dish of my own invention and doesn't follow any recipe.

Ingredients for stock and sauce. I forgot to include the tinned tomatoes!

This is where it starts - poaching a whole chicken in big pan of water along with carrot, onion, leaf celery stalks, black peppercorns, curry leaves, a de-seeded chilli, fresh ginger, salt and (key ingredient) green Cardamoms. Normally I would put a Bay leaf and a couple of Cloves in to make a stock, but today I wanted a significantly different background note.


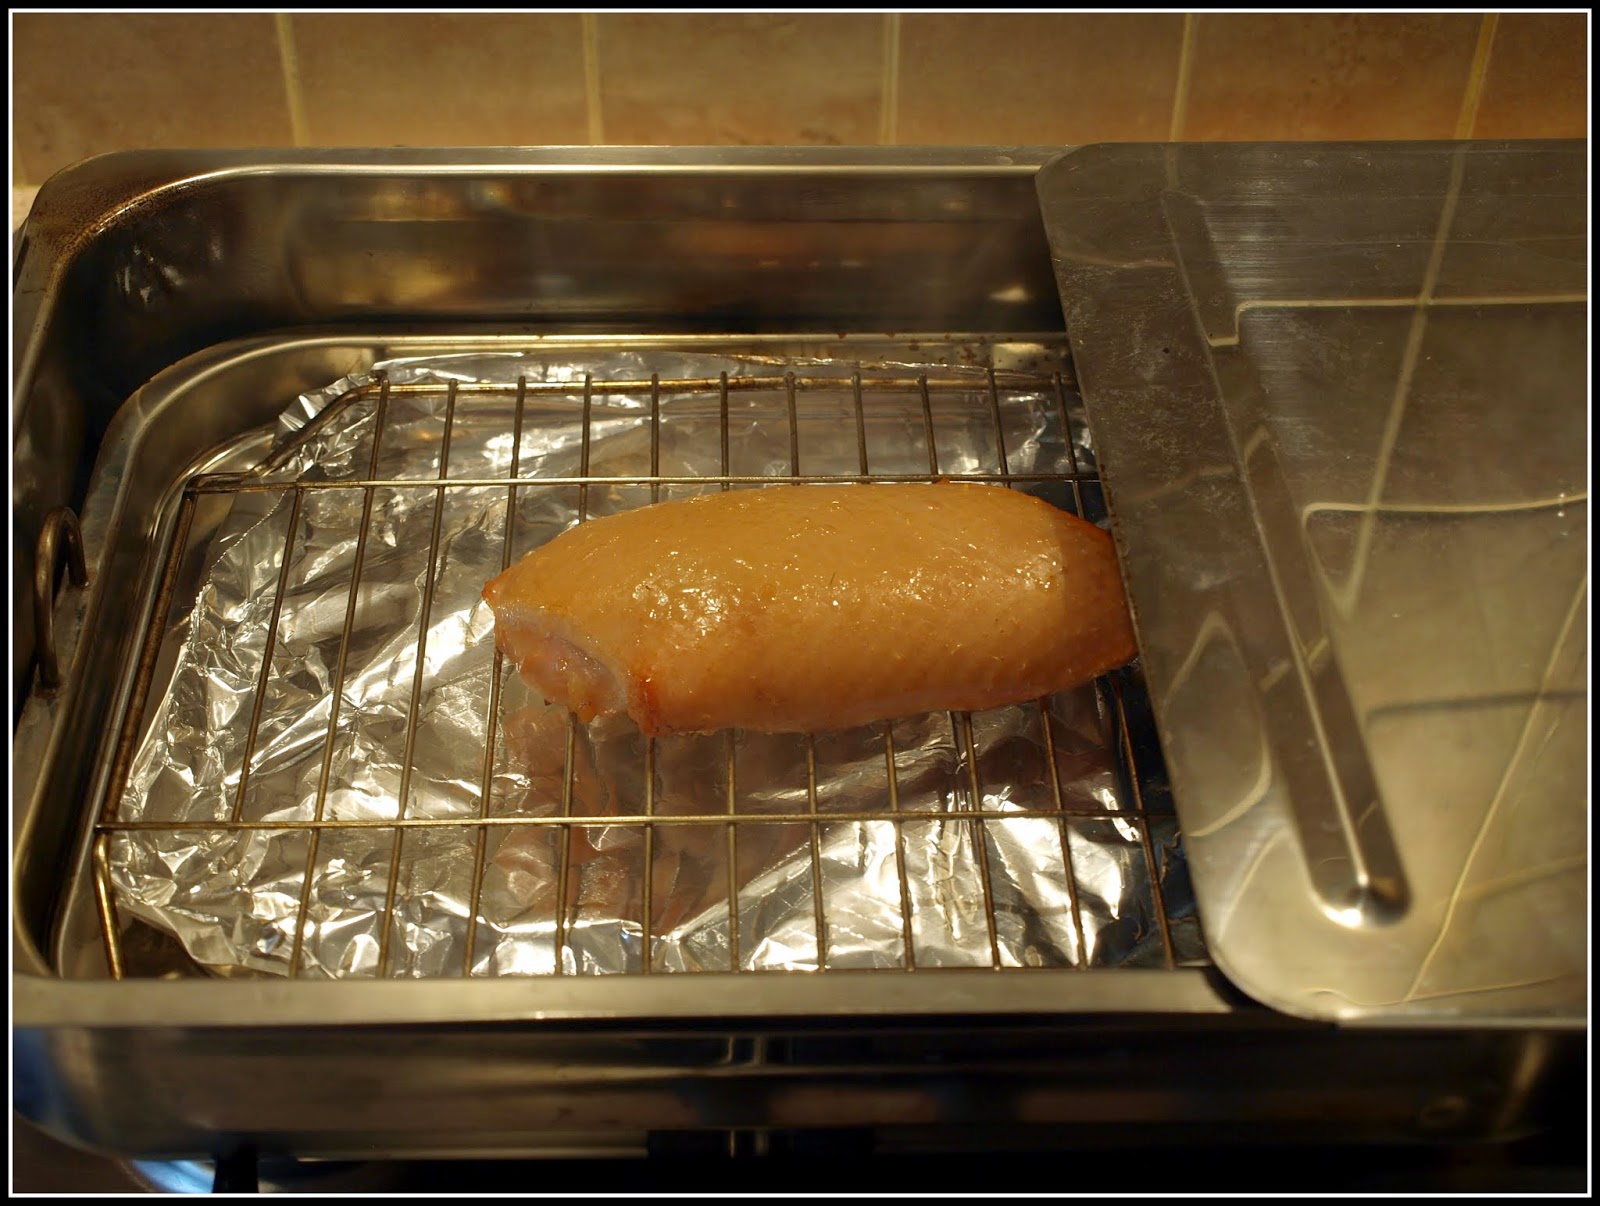
The chicken needs to poach at a low simmer for about an hour, after which the meat will be very tender and will slip off the bones very easily. I removed the breast and thigh portions and set them aside for later, while returning the rest of the carcass to the pot.


The stock was then boiled rapidly for about half an hour to concentrate it, and strained through a sieve. I must add that I tasted the stock a couple of times just to check that the Cardamoms had sufficiently infused it without being overpowering. Incidentally, I split the husks of the Cardamom pods to expose the seeds, which is where the real flavour comes from.

Now I made the sauce, gently cooking some sliced onions and a couple of cloves of garlic in some vegetable oil over a low heat to soften them, then stirring in a generous quantity of Jane's curry powder before adding a tin of chopped tomatoes and about half a litre of the stock. I also added a little of my home-made paprika to enhance the colour. This mixture was then cooked at a low simmer for about 15 minutes, allowed to cool a little and finally blended to a fine texture in the food-processor. At this point the majority of the cooking was complete.

Sauce prior to blending

Later, I peeled, sliced and cooked a large mango. Normally I would not have needed to cook the mango at all, but I felt that it was not as ripe as I would have liked, so I warmed up some of the sauce and cooked the mango in it until it softened sufficiently. [Getting properly ripe mangoes is far from easy in the UK!]. When this was done, I layered the reserved chicken meat into a large casserole, covered it with the rest of the sauce and heated it thoroughly. (About an hour at 150C).


While this was going on I cooked some Basmati rice in the electric rice-cooker. Although the delicious aroma of the curry sauce was by this time pervading the whole house, I have to say that nothing compares to the wonderful smell of Basmati rice cooking!

During the afternoon I had used another mango to make a sambal (a bit like a salsa I suppose) to accompany the main dish. It consisted of chopped mango with some finely-diced red chilli, some Asian red shallot quick-pickled in red wine vinegar, moistened with the juice of a lime and garnished with toasted Cashew nuts and Leaf Celery microgreens.

The sambal served in an authentic Jaipur blue dish - bought in Jaipur!

So here is the finished dish:


The contrast between the soft cooked mango and the rather crunchy mango in the sambal was very nice!


I was pleased with the result. Not too hot. Not too sweet. Just right. And whether by luck or by good judgement, the background taste (and smell) of Cardamom was subtle, but pleasantly noticeable. I don't know what an Indian person would make of this, but this is the sort of curry I like!

Saturday 29 November 2014

Raindrops keep fallin' on my....broccoli

Not many words (lyrics?) today, just pictures. My pictures of raindrops on Brussels Sprouts posted the other day were popular, so here is a variation on that theme: raindrops on broccoli leaves. A study of surface tension. Enjoy!


You know that I'm looking forward to getting some frost now, don't you!

Friday 28 November 2014

Pruning the Geraniums

A couple of days ago, fellow blogger Jo posted to her blog The Good Life about pruning Geraniums (Pelargoniums) in order to keep them over Winter for next year. This has shamed me into doing the same...

For me the task was not a big one. This year I have only had one Geranium plant, but it has occupied a prime position in a pot right by the front door. After the frost we had on Monday, it was looking pretty "Past it".


The recent mild damp weather has provided just the sort of conditions in which moulds thrive, and the Geranium's leaves and (faded) blooms were covered in fungal growths of one sort or another:


Actually it was hard to tell what was fungal growth and what was just tiny water droplets clinging to the hairs on the leaves. It looked as if the whole plant had been lightly dusted with icing-sugar!

Well, if this plant was to survive, it needed drastic surgery, which is exactly what it got:


As you can see, I trimmed off most of the leaves and quite a bit of the "wood", leaving only four main stems. This is what came off:


As I trimmed off the stems and leaves I realised that there was an opportunity for me to use some of these cuttings to produce some new plants. I chose four of the strongest-looking shoots;


Removing all but a few of the smallest leaves, I pushed these cuttings into some 3" pots full of damp compost. Et voila - four new Geranium plants in the making (hopefully)! They are now sitting indoors on the windowsill of the spare bedroom.


Actually it is far from certain whether any of them will "take" (start growing), but it's definitely worth a try because otherwise they would have gone straight in the compost bin with all the other trimmings - along with this voracious little monster:

Thursday 27 November 2014

From the Sublime to the Ridiculous

You know I have recently been showing off a few really good-looking Parsnips? Like these ones...

Parsnips "Duchess"

I harvested those Parsnips today. The bigger one weighed 240g. Long, straight and practically unblemished - just how Parsnips should be. However...
At the same time I harvested this one:

Parsnip "Guernsey Half-Long"

It's not quite so good-looking, is it?

As you will have seen from the captions, I am growing two varieties of Parsnip - "Duchess" and "Guernsey Half-Long". The distorted (or "forked") parsnip seen above is the first one of the "Guernsey Half-Long" ones. I hope they are not all going to be like that!


What is it that makes one parsnip straight and regular, and another one squat and forked? Forking in parsnips is supposed to be caused by either too many stones in the soil (there are none in my raised bed), or recently-manured soil (my raised bed had a little pelleted chicken manure added last Autumn). But anyway, both of my types are growing in the same bed, so it can't be anything to do with the soil, which is exactly the same for both.


This specimen is not entirely useless. I will remove the long straggly bits, leaving an apple-sized central core which will be OK, but it's not going to be as nice as the straight ones.


I'm impatient now to see what the other parsnips will be like. You just can't get any clue about that until you pull them up.

Wednesday 26 November 2014

A very English meal

These days Britain is a very multi-cultural place, and it's harder than ever to define "British" food - still less "English" food. Apparently Chicken Tikka Masala is just as popular as Fish and Chips, and I can see why! Jane and I love food of many different types - European, Asian, Mexican, Middle Eastern etc - and at home we eat a very varied diet, but today I'm going to write about a meal I would consider to be very English in its character: roast pork with Brussels sprouts and carrots. This is an example of the traditional "Meat and two veg" which is eaten in many English households as their Sunday lunch or dinner.


My present enthusiasm for British food is as a direct result of my (our, because Jane is included too) involvement with The Great British Cookbook. Attending the launch party for the book last week we had the honour to meet Johnny Pusztai, the butcher featured in the book. He is a larger-than life character - stout of physique, and unstoppably garrulous in a most engaging way. At the party he and his team of helpers were serving up a Hog-roast - a whole pig cooked long and slow, so that its meat was very very tender. The portions of meat were served on a large granary bread roll, accompanied by apple sauce and sage-and-onion stuffing. It was amazingly good! Now, I'm not about to start cooking a whole pig for just Jane and me, but having experienced the Hog-roast I certainly did fancy cooking a piece of pork.

I found a suitable piece in our local branch of Morrisons. It was a loin joint - effectively 6 huge chops still joined together. Before you go thinking that this was extravagant, let me just put it into perspective for you. This piece of meat, weighing about 1.5kg (including bones), cost £8.83, in other words about the price of one fairly ordinary pub-food meal, and it provided food for two of us for two meals. If we had eaten meat like this in a fancy restaurant, we would probably have had one chop each and been charged about £20 per person!

I roasted the meat in the oven, closely following the instructions on the label - "Cook in a pre-heated oven at 200C. Allow 30 mins for each 500g and 30 mins extra, plus at least 20 mins standing-time after cooking." Here it is when cooked:


The only disadvantage with this cut of meat is that it has only a thin layer of skin and fat, so it does not produce any crackling. What a shame, because I love crackling! As you can see in the photo above, it did not produce much juice either, so lots of gravy was called for. When it came to making the gravy I drew on inspiration from Johnny once more, because his "House" gravy is one made with onions and cider. I can vouch for the fact that it goes with pork very well indeed.

To accompany the roast pork I cooked two different vegetables - Brussels Sprouts and carrots - both from my own garden. Oh, and some potatoes too, though these were not from my garden.


I kept them plain. With vegetables as fresh as these it makes sense not to mess about with them too much, just enjoy their flavour.

Right, so let's put it all together:


 Do you see that I have chosen an end-piece of the pork? I do love the rather caramelized taste of the "Well Done" part of a joint. Inside, though, the meat was soft and tender; not at all dry. I took my photos with just a little gravy poured over the plate, but you can rest assured that after the photos were taken I added a lot more gravy!

On the plate you can probably see a dollop of Apple Sauce too. This is another very traditional accompaniment for roast pork.


So there you go then. It's not a sophisticated meal by any stretch of the imagination, but wholesome, hearty and comforting.

By the way, as I hinted earlier,that piece of meat gave us two meals. The leftovers went into a Chinese-style dish!

Tuesday 25 November 2014

On close inspection...

The weather here is still very mild for the time of year. Not that I mind not having to scrape ice of the car windscreen before heading off to work...!

I love photographing frost on things. This picture of mine appears in the newly-published Great British Cookbook


No opportunities like that have arisen just yet, but the next couple of photos show you that we have definitely had some rain. The photos were taken early in the morning, so the lines of droplets on these Brussels Sprouts may be partially dew as well as rain.


This is the head of one of my PSB plants. This photo makes it look big, but it's really very small.


Amazingly, I still have a Raspberry plant that is producing ripe berries - just one or two. This photo was taken on 20th November.


Some of the Dogwood bushes have shed all their leaves now (see red stems in photo below), but this one hasn't. It's Cornus Alba "Midwinter Fire".


The Buddleia seems to think that it's Springtime already, as it's covered in fresh leaf growth. I love the colour and texture of those steely-grey downy leaves!


P.S. I drafted this post last weekend, and of course since then the temperatures have taken a dive, so maybe next weekend I'll be able to start photographing frost again!

Monday 24 November 2014

Harvest Monday - 24 November 2014

My harvests this week have been very meagre. But considering it's nearly the end of November, that's only to be expected.


I did at least get another batch of Brussels sprouts. Here they are in their "just picked" state:


They look pretty scruffy like that! Any damaged or yellowing outer leaves need to be removed, and the woody bases trimmed.


This is the same batch prepared and ready for cooking:


Here they are next to a bowl full of baby carrots from last week's crop. Together they made the ideal accompaniment to a joint of roast pork which I cooked on Saturday.


Other than the sprouts, I think the only thing I have picked (apart from a few herbs) was a very small lettuce which provided a garnish for the Smoked Duck dish I wrote about yesterday.


So that's my contribution to Harvest Monday for this week. Maybe someone else will have grown something a bit more impressive?

Sunday 23 November 2014

Smoked Duck with quick-pickled pears

Inspired by the recent publication of The Great British Cookbook, I felt that I ought to put in a bit more effort than usual when it came to my turn to cook dinner. We don't normally have a Starter, but this time I reckon it was justified. This post describes what I made, and maybe in a day or two I'll describe the Main that followed it.

It's a long time since I used my stovetop smoker, and I felt it was time to give it another turn to earn its keep, so my chosen dish was Smoked Duck breast with quick-pickled pears.

My technique for the duck was to smoke it for about 10 minutes to give it the right amount of flavour, (I used Alder wood chips) and then put it under a hot grill for a while to finish cooking the meat and give the skin a nice colour. Smoking the duck doesn't give me much opportunity to show you the technique - just a stainless steel pan with a few wisps of smoke coming out of it...


After 10 minutes I checked the meat and felt that it could do with a couple more minutes, so it ended up being smoked for the best part of 15 minutes, after which it looked like this:


While the duck was smoking, I heated up the grill to a high temperature and subsequently transferred the meat to it, cooking it initially skin side uppermost to give the skin a nice colour, and then turning it over to cook the flesh.


Judging when the meat was sufficiently done was difficult - I don't have much experience of this - so it was very much a matter of trial and error! I sliced into the meat with a very sharp knife a couple of times to see how things were going. When I judged it ready, I lifted the meat onto a chopping-board and left it to rest. As you can see in the photo below, the duck breast was very juicy, and juice continued to run out of it for quite a while.


When the duck was completely cold, I put it in the fridge. Later on I sliced it thinly:


I know that opinions on how to serve duck differ widely, but that looks just right for me!


Meanwhile, I made my pickled pears. Pickling pears in the traditional way takes a fair old while (I have described it HERE), but this time I used a super-quick method instead. I peeled and quartered one large firm pear and then poached it for about half an hour in water to which I had added about 25ml of Cider vinegar, a quarter teaspoon of Mixed Spice (a mix of sweet spices like Cinnamon, Cloves, Ginger etc) and about a tablespoon of Sweet Freedom (a diabetic-friendly sugar substitute).


Cooking the pears in an open saucepan like this allows the poaching liquid to evaporate, thus concentrating the flavours. When sufficiently cooked the pears were soft (easily pierced with the point of a knife), but still firm enough to be sliced. I put them in a covered plastic box in the fridge to chill.

OK, so here is the finished dish, plated-up:


My enthusiasm for the stovetop smoker has been re-kindled. The duck was really nice - not overly smoky (The Alder wood is relatively mild), and still succulent, and the spicy-sweet pears were an excellent foil to the fatty meat. The little garnish of tiny Celeriac leaves was good too - we are very fond of those these days. I shall definitely be growing them regularly from now on.